

Heading into the great outdoors for a weekend camping trip is an exciting adventure. The crisp mountain air, peaceful forest trails, and quiet evenings around a campfire offer a wonderful break from busy routines. However, arriving at your campsite and staring at a bundle of poles, stakes, and nylon fabric can quickly feel intimidating. If you feel nervous about pitching your first shelter, you are not alone. Learning how to set up a tent for the first time step by step is an essential skill that transforms initial worry into pure confidence. With straightforward techniques and basic preparation, assembling your tent takes only a few minutes. Here is everything you need to know to pitch a cozy, weather-resistant shelter with ease.
Choosing the Right Spot at Your Campsite
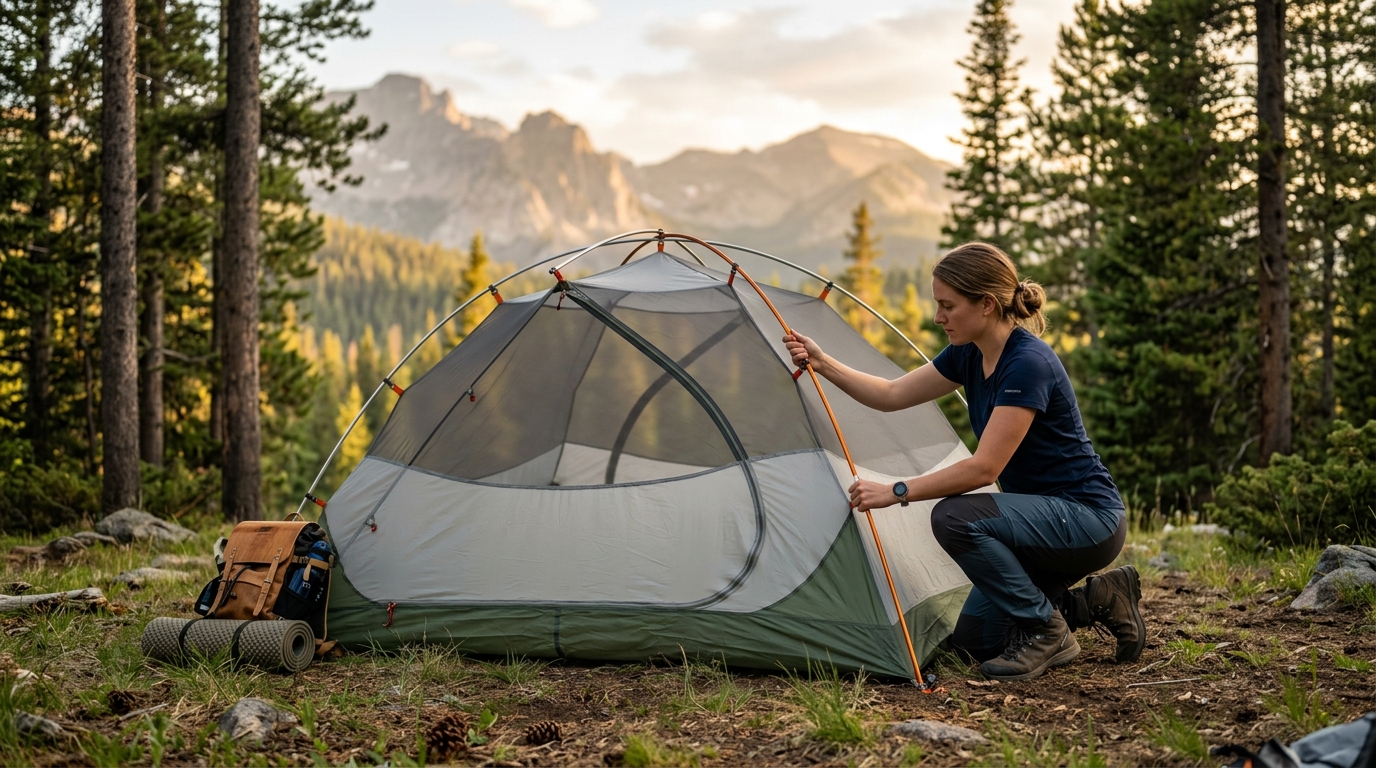
Before you untie a cord or pull equipment from your bag, take a moment to survey your surroundings. Selecting the right patch of ground is the most important step for a restful night under the stars. Even a premium shelter will fail to keep you comfortable if pitched over jagged rocks or in a low ditch.
Look for ground that is as flat and level as possible. Sleeping on a slope causes you to slide down your sleeping pad all night, leaving you waking up tired. If you must pitch on a slight incline, position the tent so your head points uphill rather than downhill.
Next, look straight up into the tree canopy. Campers often refer to dead hanging branches as widow-makers. Never pitch beneath dead trees or loose limbs that could fall during sudden wind gusts. In addition, keep these ground safety rules in mind:
- Clear away sharp stones, pinecones, twigs, and roots that could puncture your tent floor.
- Avoid low depressions or dry gullies where rainwater can pool during overnight downpours.
- Keep a safe distance of twenty to twenty-five feet from the campfire ring to protect fabric from sparks.
- Use natural windbreaks like large boulders or dense bushes to shield your shelter from chilly winds.
- Camp at least two hundred feet from lakes and streams to protect sensitive shoreline wildlife habitats.
Unpacking and Laying Out Your Tent Components
Once you locate a flat, clear spot, sweep the ground gently with your boots or hands. Now unpack your gear in an organized manner. Dumping all your poles and stakes into a messy pile often results in lost pieces in the grass.
Start by laying down your ground cloth or footprint. A footprint is a durable waterproof tarp designed to sit beneath your shelter. It shields the thin tent floor against damp soil, sharp rocks, and ground moisture. Center the footprint on your cleared spot, ensuring it does not stick out past the perimeter of your tent walls. If a footprint extends beyond the walls, it can catch falling rain and funnel water directly under your sleeping floor.
Next, lay your inner tent body directly on top of the footprint. Locate the main door and orient it in the direction you desire. Most campers prefer facing their entrance toward a scenic view, a peaceful sunrise, or away from prevailing winds. Spread the corners outward evenly so the base forms a neat rectangle.
Understanding how to set up a tent for the first time step by step means keeping your hardware organized from the very beginning:
- Separate your main structural poles and lay them flat beside the tent body.
- Keep metal stakes inside their accessory pouch so you do not misplace them in the dirt.
- Keep the rainfly folded neatly nearby until the inner canopy is fully erected.
Assembling the Tent Poles and Raising the Frame
Modern camping shelters feature shock-corded aluminum or fiberglass poles. An internal elastic cord connects the sections together. Take each pole section and slide the joints together smoothly by hand. Avoid swinging or snapping the poles together like a wand, as slamming the metal ferrules can crack the joints.
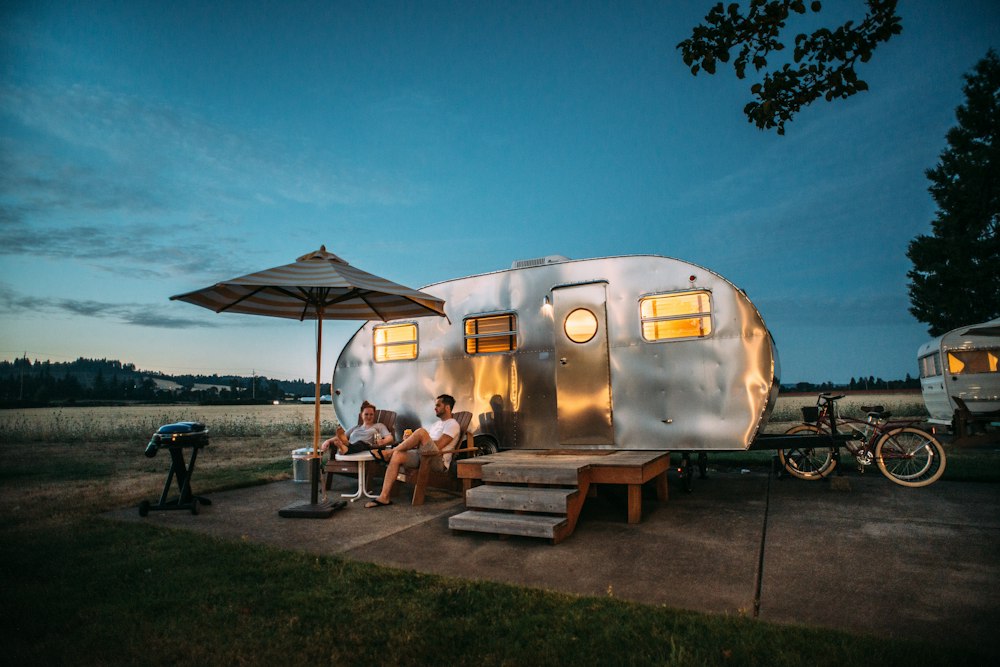
Once your poles are assembled into full-length rods, lay them in an X-shape across the top of your flattened tent body. Most classic dome tents use two main poles that cross in the center. Depending on your tent model, the fabric attaches using sleeves or exterior clips:
- Sleeve Style: Slide the pole tips gently through the continuous fabric sleeves along the roof seams. Always push the poles through rather than pulling them, which can disconnect segments inside the sleeve.
- Clip Style: Place the pole tips directly into the corner grommets first to form freestanding arches. Then walk around and snap the plastic clips onto the poles to lift the canopy walls.
Insert the end of each pole into the corner grommet, eyelet, or pin at the base of your tent floor. Bend the pole gently into an upward arch using steady pressure until the opposite tip seats into its corner pin. Once both poles are secured, your inner tent rises into a sturdy freestanding dome.
Securing the Rainfly and Guyline Setup
Even if the afternoon sky looks clear and sunny, you should always attach your rainfly. Weather in mountain valleys, lakes, and forests can change rapidly after dark. The rainfly serves as your primary shield against evening dew, sudden thunderstorms, and chilly breezes.
Drape the rainfly over the top of your raised tent structure. Make sure the doors of the fly line up accurately with the doors of your inner tent. Look underneath the rainfly to locate small velcro straps. Fasten these tabs around the underlying poles. Securing these velcro attachments locks the fly directly to the frame, adding substantial strength against gusty winds.
Next, attach the corner buckles of the rainfly to the matching clips at the base of your tent. Pull the corner tension straps evenly until the outer fabric sits taut and smooth. A sagging rainfly can touch the inner mesh wall, causing moisture to seep inside during humid nights.
For maximum stability, deploy your guylines. Guylines are thin reflective cords attached to anchor points on your rainfly. Pull each guyline outward at a forty-five-degree angle and anchor it securely into the ground with a stake. Adjust the plastic tension sliders until the cords are firm. This creates a drum-tight outer surface that sheds rain and prevents noisy fabric flapping throughout the night.
Driving the Stakes and Anchoring Your Shelter
With your tent and rainfly fully erected, you must anchor the entire unit firmly into the ground. Never assume the weight of your gear will prevent your shelter from shifting during an unexpected wind gust.
Start with the four base corners of your tent. Pull each corner webbing loop outward until the tent floor is flat and wrinkle-free. Drive a stake into the ground at a forty-five-degree angle pointing away from the tent body, like a boat anchor. Push the stake into the soil with your boot heel or tap it gently with a small camp mallet. Avoid stomping violently on lightweight aluminum stakes, as they can bend easily in rocky soil.
Next, stake out the front and rear vestibules of your rainfly. Pulling the vestibule fabric taut creates a covered porch outside your zippered door. This covered space is the ideal dry spot to store muddy hiking boots, trekking poles, and camp chairs without tracking dirt into your sleeping area.
Tent Setup Checklist for Beginners
| Step # | Action Item | Key Detail to Remember |
|---|---|---|
| 1 | Scout & Clear | Flat ground, no dead branches above, rocks cleared. |
| 2 | Lay Footprint | Must not stick out past the tent floor perimeter. |
| 3 | Assemble Poles | Slide joints gently by hand; push rather than pull. |
| 4 | Attach Rainfly | Fasten velcro tabs to poles and pull tension straps taut. |
| 5 | Stake & Guylines | Stake at 45-degree angle; tighten reflective guylines. |
Practical Tips for Stress-Free Tent Camping
Mastering how to set up a tent for the first time step by step comes down to smart preparation and helpful outdoor habits. Keep these practical tips in mind every time you plan a trip:
- Practice in Your Backyard First: Pitch your tent at home before departing to ensure all parts and instructions are present.
- Pack a Compact Rubber Mallet: A lightweight rubber mallet makes driving stakes effortless and protects your equipment from damage.
- Keep Footwear in the Vestibule: Leave muddy shoes outside the inner tent to keep your sleeping floor clean and dry.
- Open Built-In Roof Vents: Always leave the small vents on your rainfly open to prevent moisture droplets from forming on the ceiling.
- Store Poles and Stakes in Separate Bags: Slide poles into protective pouches to prevent sharp edges from tearing canopy fabric during travel.
Ready for Your Next Camping Adventure?
Pitching an outdoor shelter does not need to feel complicated or stressful. When you practice how to set up a tent for the first time step by step, the entire setup becomes an enjoyable ritual of arriving in nature. With a well-chosen campsite, carefully assembled poles, and taut guylines, your shelter will stand strong against wind and weather, keeping you warm, dry, and comfortable all night long. Pack your gear, invite your family or friends, and head out to enjoy the rewarding experience of sleeping peacefully under the stars!
For official park guidelines and wilderness safety bulletins, refer to the National Park Service wilderness guidelines.